Connecting to Aruba ClearPass
Procedure
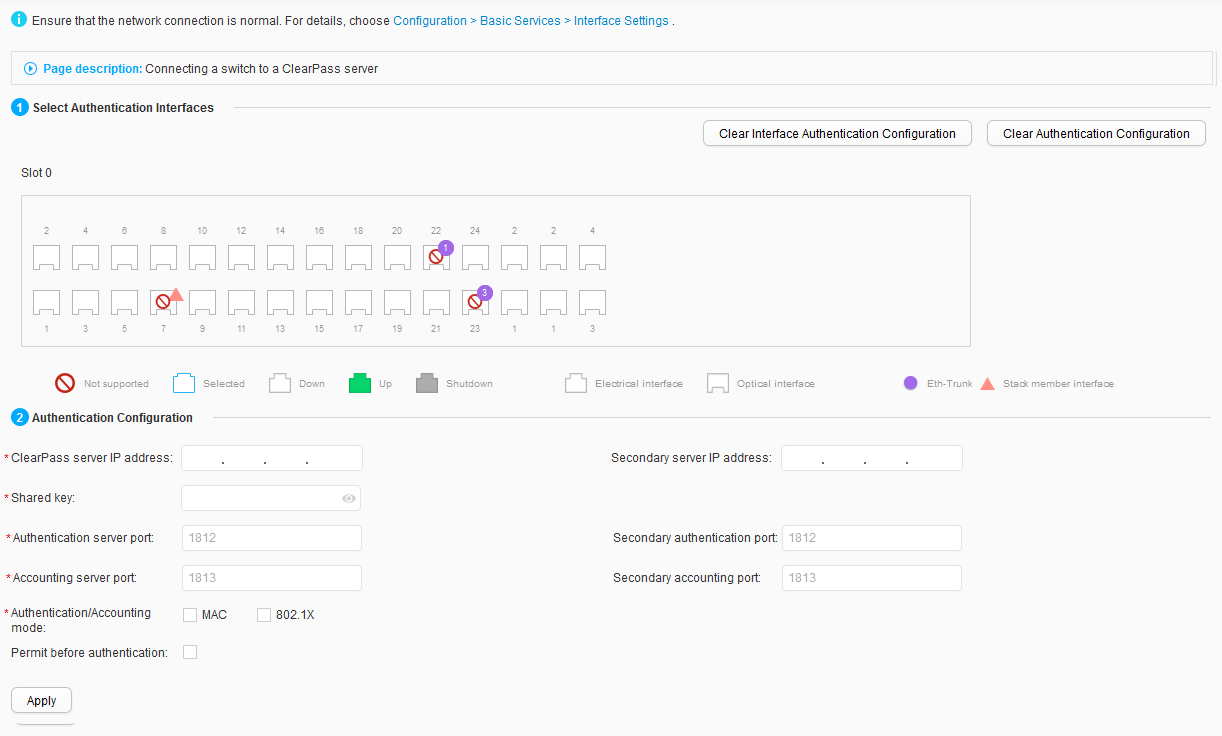
- Choose . The configuration page is displayed, as shown in Figure 1.
- In the Select Authentication Interfaces area, select interfaces for authentication configuration by performing any of the following operations based on actual requirements:
- Click an interface icon to select an interface. You can click the icon again to deselect the interface.
- Drag the mouse to select continuous interfaces in batches.
- Click multiple interface icons to select them. You can click a certain icon again to deselect the interface.
- (Optional) To clear the existing authentication configuration on an interface, select the interface and click Clear Interface Authentication Configuration.
To clear all authentication configurations on the device, click Clear Authentication Configuration.
- In the Authentication Configuration area, set authentication parameters by referring to Table 1.
Table 1 Authentication parameters Parameter
Description
ClearPass server IP address
IPv4 address of the ClearPass server.
Secondary server IP address
Backup IPv4 address of the ClearPass server.
Shared key
Shared key of the ClearPass server.
Authentication server port
Authentication port number of the ClearPass server.
Secondary authentication port
Backup authentication port number of the ClearPass server.
Accounting server port
Accounting port number of the ClearPass server.
Secondary accounting port
Backup accounting port number of the ClearPass server.
Authentication/Accounting mode
Authentication and accounting mode.
Permit before authentication
Configure an authentication-free rule.
- Select Permit before authentication. The Permit Rules area is displayed, as shown in Figure 2.
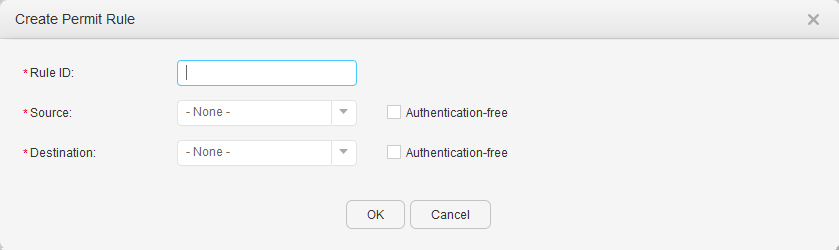
- Click Create. The Create Permit Rule dialog box is displayed, as shown in Figure 3.
Table 2 describes parameters in the Create Permit Rule dialog box.
Table 2 Authentication-free rule parameters Parameter
Description
Rule ID
ID of an authentication-free rule.
Source
IP address of a user who can access some resources before being authenticated.
- - None -
- All IP address
- Specified
All users can access when Source is set to Authentication-free.
Source IP address
Source IP address.
This parameter is configurable only when the Source is set to Specified.
Mask
Mask of the source IP address.
This parameter is configurable only when the Source is set to Specified.
VLAN
VLAN ID of source packets.
This parameter is configurable only when the Source is set to All IP address or Specified.
Destination
Destination network resource that a user can access without authentication.
- - None -
- All IP address
- Specified
Destination network resource that a user can access without authentication when Destination is set to Authentication-free.
Destination IP address
Destination IP address.
This parameter is configurable only when the Destination is set to Specified.
Mask
Mask of the destination IP address.
This parameter is configurable only when the Destination is set to Specified.
Protocol type
Protocol used by users to access all destination network resources without authentication.
This parameter is configurable only when the Destination is set to Specified.
Destination port number
UDP or TCP destination port number.
This parameter is configurable only when the Destination is set to Specified.
- Click OK.
- Click Apply to complete the configuration.