Example for Configuring STelnet Login for an IPv6 User
This section describes how to allow an IPv6 user to log in to an SSH server through STelnet to implement STelnet remote login and device management.
Networking Requirements
Large numbers of devices need to be managed and maintained on a network. You cannot connect each device to a terminal. When no reachable route exists between remote devices and a terminal, you can use Telnet to log in to the remote devices from the device that you have logged in to. Telnet provides no secure authentication mode, and data is transmitted in simple mode over TCP, which brings security risks.
STelnet is a secure Telnet service based on SSH connections. SSH provides encryption and authentication and protects devices against attacks, such as IP spoofing.
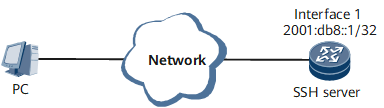
As shown in Figure 1, after the STelnet server function is enabled on the router functioning as an SSH server, the PC functioning as an SSH client can log in to the SSH server in password, RSA, password-rsa, ECC, password-ecc, DSA, password-dsa, password-sm2, SM2, x509v3-ssh-rsa, password-x509v3-rsa, or All authentication mode. RSA authentication mode is used in this example.
To prevent unauthorized users from logging in to the SSH server and improve system security, configure ACL6 rules on the SSH server.

Interface1 in this example represents GigabitEthernet0/0/0.
This section uses the management interface as an example to describe how to configure STelnet login. In actual application scenarios, you can select an interface for communication between the client and server based on the networking.
Configuration Roadmap
The configuration roadmap is as follows:
Log in to the SSH server through the console port and configure an IPv6 address for the management interface on the SSH server.
Configure the VTY user interface on the SSH server.
Create a local SSH user and configure the authentication mode and service type.
Create an SSH user and configure the authentication mode for the user.
On the SSH client, create a key pair based on the configured SSH user authentication mode and copy the public key to the SSH server.
On the SSH server, edit the public key and assign the edited public key to the user.
Enable IPv6 STelnet on the SSH server and set the service type of the SSH user to STelnet.
Configure an ACL6 rule for STelnet client login on the SSH server.
Set parameters for STelnet login to the server.
Data Preparation
To complete the configuration, you need the following data:
PuTTYGen.exe and PuTTY.exe installed on the SSH client
IPv6 address (2001:db8::1/32) of the management interface on the SSH server
- Routes available between the SSH client and the management interface on the server
Local user's authentication mode (password), username (huawei123), and password (Hello@123)
SSH user's authentication mode (RSA)
Basic ACL6 2000, used to allow the clients of the network segment 2001:db8::1/32 to access the SSH server
Procedure
- Configure an IPv6 address for the management interface on the SSH server.
<HUAWEI> system-view
[~HUAWEI] sysname SSH Server
[*HUAWEI] commit
[~SSH Server] interface GigabitEthernet0/0/0
[~SSH Server-GigabitEthernet0/0/0] undo shutdown
[~SSH Server-GigabitEthernet0/0/0] ipv6 enable
[*SSH Server-GigabitEthernet0/0/0] ipv6 address 2001:db8::1 32
[*SSH Server-GigabitEthernet0/0/0] commit
[~SSH Server-GigabitEthernet0/0/0] quit
- Configure the VTY user interface on the SSH server.
[~SSH Server] user-interface maximum-vty 15
[~SSH Server] user-interface vty 0 14
[*SSH Server-ui-vty0-14] authentication-mode aaa
[*SSH Server-ui-vty0-14] protocol inbound ssh
[*SSH Server-ui-vty0-14] user privilege level 3
[*SSH Server-ui-vty0-14] commit
[~SSH Server-ui-vty0-14] quit
If SSH is configured as the login protocol, the device automatically disables the Telnet function.
- Create a local user on the server, add the user to the administrator group, and configure the service type of the user.
[~SSH Server] aaa
[~SSH Server-aaa] local-user huawei123 password cipher Hello@123
If cipher or irreversible-cipher is not specified, a password is entered in man-machine interaction mode and the system does not display the entered password.
When the user security policy is configured, the value is a string of 8 to 128 case-insensitive characters without spaces. When the user security policy is not configured, the value is a string of 1 to 128 case-insensitive characters without spaces.When the user security policy is configured, the password cannot be the same as the user name or its reverse. The password must contain the following characters: upper-case character, lower-case character, digit, and special character.
Special characters do not include question marks (?) or spaces. However, when double quotation marks are used around a password, spaces are allowed in the password.- Double quotation marks cannot contain double quotation marks if spaces are used in a password.
- Double quotation marks can contain double quotation marks if no space is used in a password.
For example, the password "Aa123"45"" is valid, but the password "Aa 123"45"" is invalid.
If cipher is specified, a password can be entered in either simple text or cipher text.
If a password is entered in simple text, the password requirements are the same as those when cipher is not specified. When you input a password in simple text, the system displays the password in simple text mode, which brings risks.
A password is displayed in cipher text in the configuration file regardless of whether it is entered in simple text or cipher text.
If irreversible-cipher is specified, a password can be entered in either simple text or irreversible cipher text.
If a password is entered in simple text, the password requirements are the same as those when irreversible-cipher is not specified.
A password is displayed in cipher text in the configuration file regardless of whether it is entered in simple text or irreversible cipher text.
[*SSH Server-aaa] local-user huawei123 service-type ssh
[*SSH Server-aaa] local-user huawei123 user-group manage-ug
[*SSH Server-aaa] commit
[~SSH Server-aaa] quit
- Create an SSH user on the server and configure the authentication mode for the user.
[~SSH Server] ssh user huawei123
[*SSH Server] ssh user huawei123 authentication-type rsa
[*SSH Server] commit
- Use PuTTY to create an RSA key pair on the SSH client and copy the public key to the SSH server.
- Enter the Windows command-line interface.
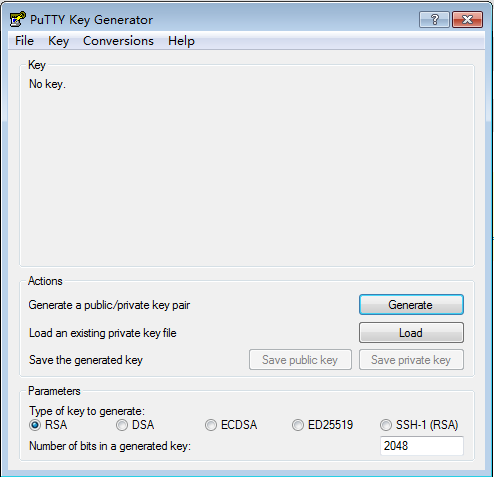
Enter PuTTYGen and click Generate to generate a key pair, as shown in Figure 2.
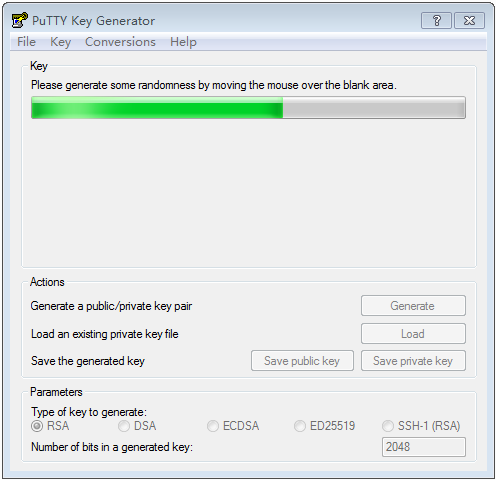
Move the mouse continuously during the generation of the key pair and move the pointer in the window other than the process bar in green. Otherwise, the progress bar stops, and the generation of the key pair stops as well. Figure 3 shows that the key pair is being generated.
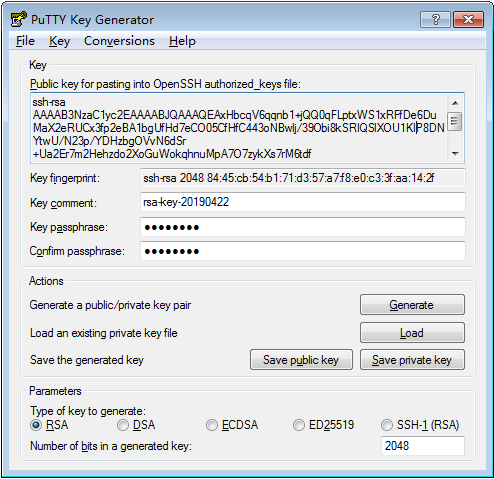
After the key pair is generated, enter the password in the Key passphrase text box and enter the password again in the Confirm passphrase text box. This password is used for the SSH terminal user to log in to the SSH server. Click Save private key, enter private for the name of the private key file, and click Save, as shown in Figure 4. Copy the generated public key to the Notepad and name it public.txt.
- On the SSH server, edit the public key and assign the edited public key to the user.
[~SSH Server] rsa peer-public-key rsa01 encoding-type openssh
[*SSH Server-rsa-public-key] public-key-code begin
[*SSH Server-rsa-public-key-rsa-key-code] ssh-rsa AAAAB3NzaC1yc2EAAAABJQAAAQEAxHbcqV6
qqnb1+jQQ0qFLptxWS1xRFfDe6DuMaX2eRUCx3fp2eBA1bgUfHd7eCO05CfHfC443oNBwlj/39Obi8kS
RIQSlXOU1KIP8DNYtwU/N23p/YDHzbgOVvN6dSr+Ua2Er7m2Hehzdo2XoGuWokqhnuMpA7O7zykXs7rM
6tdf+hh/992o6GHBD9IbJe9mG6WoAmDkBmedXzBqJeeGb2wbGg9hBTIgVQqZNhthGcVlLUlPJlZQi1ZO
L3C/cVIOXqnVOqqxHk6nlWcMRo0PxOAegtyzsBETnvcEO2xVw6zF0WVFvU60C99THB+GpuHuRdWzvUNC
ZpsjmCwkg+4RFGQ== rsa-key-20190422
[*SSH Server-rsa-public-key-rsa-key-code] public-key-code end
[*SSH Server-key-code] peer-public-key end
[*SSH Server] ssh user huawei123 assign rsa-key rsa01
[*SSH Server] commit
- Enable the IPv6 STelnet function and set the service type to STelnet.
[~SSH Server] stelnet ipv6 server enable
[*SSH Server] ssh ipv6 server-source -a 2001:db8::1
[*SSH Server] ssh user huawei123 service-type stelnet
[*SSH Server] commit
- Configure an ACL6 rule.
[~SSH Server] acl ipv6 2000
[*SSH Server-acl6-basic-2000] rule permit source 2001:db8::1 32
[*SSH Server-acl6-basic-2000] quit
[*SSH Server] ssh server acl ipv6 2000
[*SSH Server] commit
- Use PuTTY.exe to log in to the SSH server from the client.
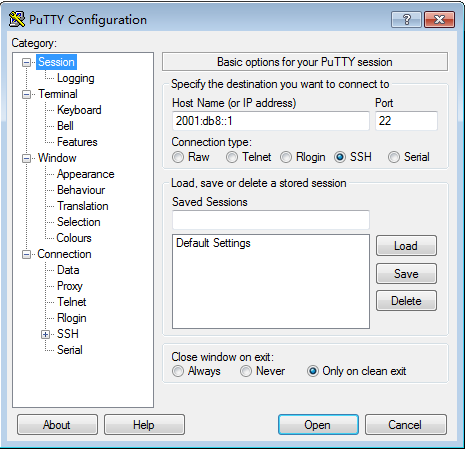
Start the PuTTY.exe program. The PuTTY configuration page as shown in Figure 5 is displayed. For security purposes, using PuTTY 0.58 or later is recommended. Enter the IP address of the SSH server in the Host Name (or IP address) text box.
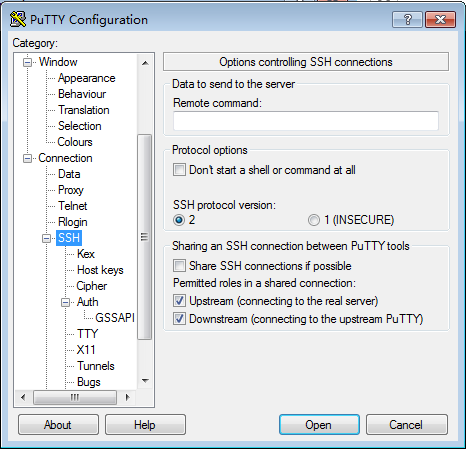
In the navigation tree on the left of the SSH client configuration page, choose Category > Connection > SSH. The dialog box as shown in Figure 6 is displayed. In the Protocol options area, set Preferred SSH protocol version to 2.
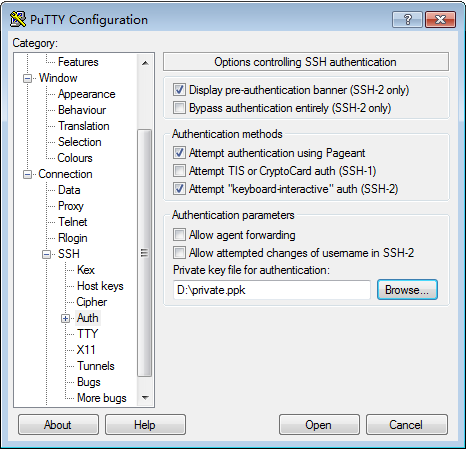
Select Auth in SSH. The dialog box as shown in Figure 7 is displayed. Click Browse to import the private key file private.ppk.
Click Open. If the connection is normal, the system prompts you to enter the user name and password, as shown in Figure 8. In this example, the user name is huawei123.

Configuration Files
SSH server configuration file
#
sysname SSH Server
#
acl ipv6 number 2000
 rule 5 permit source 2001:DB8::/32
#
rsa peer-public-key rsa01 encoding-type openssh
 public-key-code begin
  ssh-rsa AAAAB3NzaC1yc2EAAAABJQAAAQEAxHbcqV6qqnb1+jQQ0qFLptxWS1xRFfDe6DuMaX2eRUCx
  3fp2eBA1bgUfHd7eCO05CfHfC443oNBwlj/39Obi8kSRIQSlXOU1KIP8DNYtwU/N23p/YDHzbgOVvN6d
  Sr+Ua2Er7m2Hehzdo2XoGuWokqhnuMpA7O7zykXs7rM6tdf+hh/992o6GHBD9IbJe9mG6WoAmDkBmedX
  zBqJeeGb2wbGg9hBTIgVQqZNhthGcVlLUlPJlZQi1ZOL3C/cVIOXqnVOqqxHk6nlWcMRo0PxOAegtyzs
  BETnvcEO2xVw6zF0WVFvU60C99THB+GpuHuRdWzvUNCZpsjmCwkg+4RFGQ== rsa-key
 public-key-code end
 peer-public-key end
#
aaa
 local-user huawei123 password irreversible-cipher $1c$+,JS+))\\2$KVNj(.3`_5x0FCKGv}H&.kUTI`Ff&H*eBqO.ua>)$
 local-user huawei123 service-type ssh
 local-user huawei123 user-group manage-ug
#
interface GigabitEthernet0/0/0
 undo shutdown
 ipv6 enable
 ipv6 address 2001:DB8::1/32
#
stelnet ipv6 server enable
ssh ipv6 server-source -a 2001:db8::1
ssh user huawei123
ssh user huawei123 authentication-type rsa
ssh user huawei123 assign rsa-key rsa01
ssh user huawei123 service-type stelnet
ssh server acl ipv6 2000
#
user-interface vty 0 14
 authentication-mode aaa
 protocol inbound ssh
 user privilege level 3
#
return