Installing a chassis in a Cabinet
Precautions
Ensure that the cabinet has been properly installed before installing devices in the cabinet. The cabinet can be installed on an ESD floor or concrete floor.

- When installing devices, ensure that the total heat consumption of all devices in the cabinet is less than or equal to the heat dissipation capability of the cabinet.
- To prevent heat dissipation from being affected by air return, devices must be installed at an interval of 1 U or more in the cabinet. In addition, the middle-column cabinets support device stacking.
- Ensure that heat dissipation holes on the panel are not blocked.
- When the chassis is installed together with other equipment in the same cabinet, do not install the chassis near the air exhaust vent of other equipment.
- Determine whether the air exhaust vent affects adjacent devices to avoid high temperature of adjacent devices.
Installing a Chassis in a Standard 19-Inch Cabinet
- Wear an ESD wrist strap or ESD gloves. Ensure that the ESD wrist strap is grounded and in close contact with your wrist.
- Install guide rails.
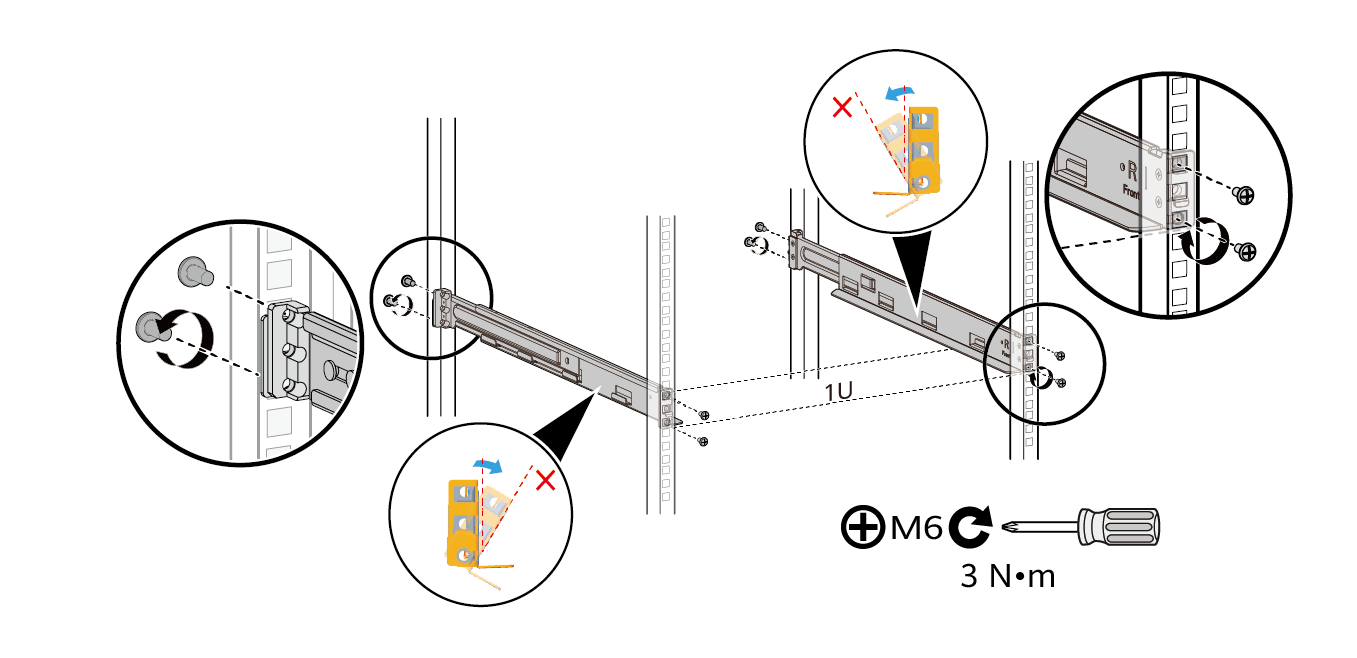
- Adjust the length of one guide rail according to the distance between the front and rear mounting rails, place the guide rail horizontally at the determined installation position in the cabinet, and hook it to the cabinet's front and rear mounting rails.
- Install M6 screws at the front and rear sides of the guide rail, tighten them to 3 N·m of torque to secure the guide rail to the cabinet, and then install another guide rail in the same manner.Figure 1 Installing expandable guide rails


Check the airflow direction of the installation site to ensure that the air flows into the device from the cold side to the hot side.

Ensure that the guide rails do not tilt inward. Install the guide rails according to the left/right markers on the guide rails.
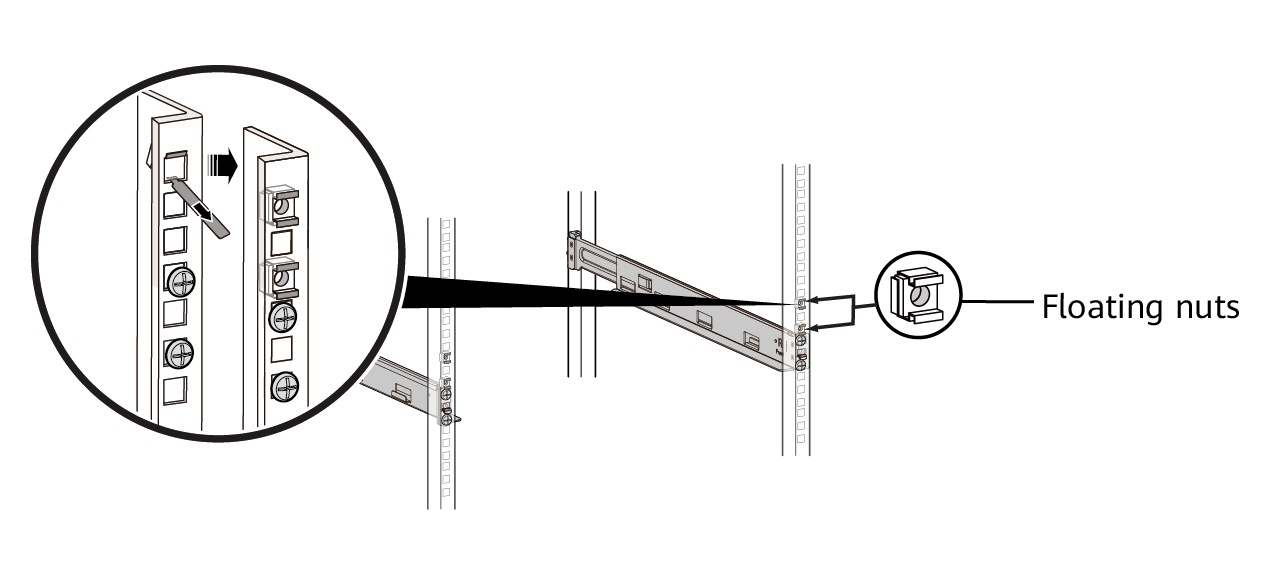
- Install floating nuts. Install two floating nuts in the positions slightly above the guide rail on each front mounting rail. As the chassis is 43.6 mm high, install the two floating nuts in every other mounting hole.Figure 2 Foating nut


Before securing the floating nuts, ensure at least 75 mm of clearance for ventilation on the left and right sides of the device following installation.
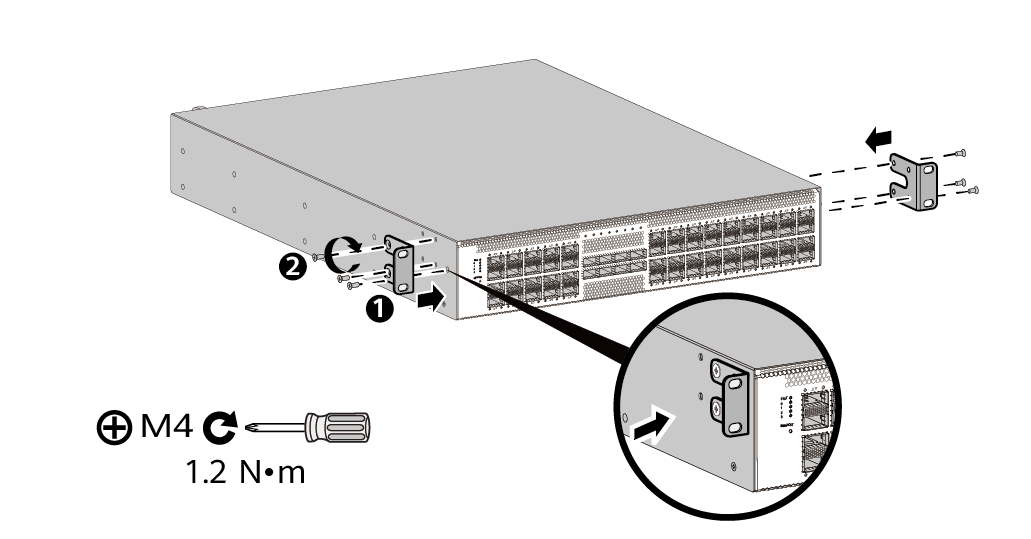
- Install mounting brackets. To secure the mounting brackets to the chassis, use a torque screwdriver to tighten the three M4 screws on each of the left and right mounting brackets to 1.2 N·m of torque.Figure 3 Install mounting brackets

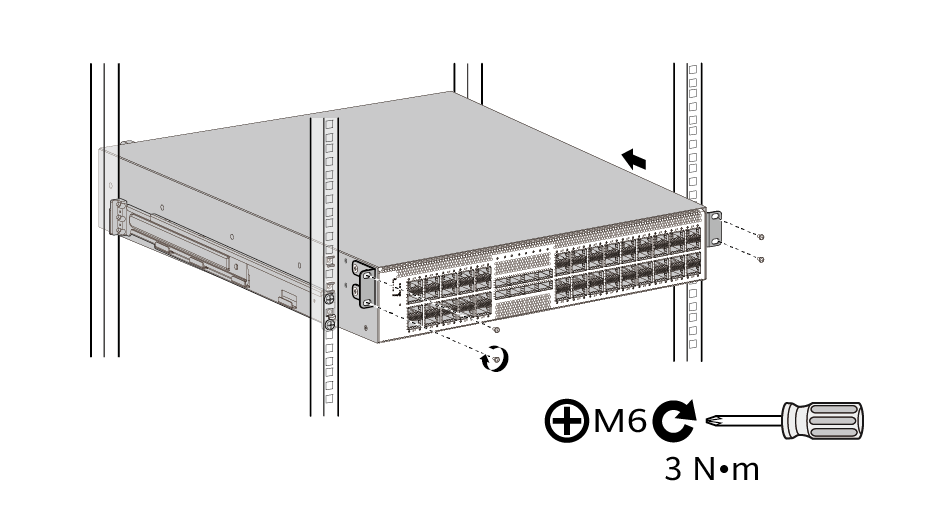
- Install the device into the cabinet. Facing the front of the cabinet, horizontally slide the chassis into the cabinet until the mounting brackets are in close contact with the mounting rails and aligned with the floating nuts. Secure the mounting brackets to the cabinet with M6 screws.Figure 4 Install the device into the cabinet


Install the device in the cabinet when facing the front side of the cabinet.

Considering the weight of the device, it is recommended that at least two persons move it to the cabinet to prevent it from falling and possibly causing injury.