WIDS Profile
Context
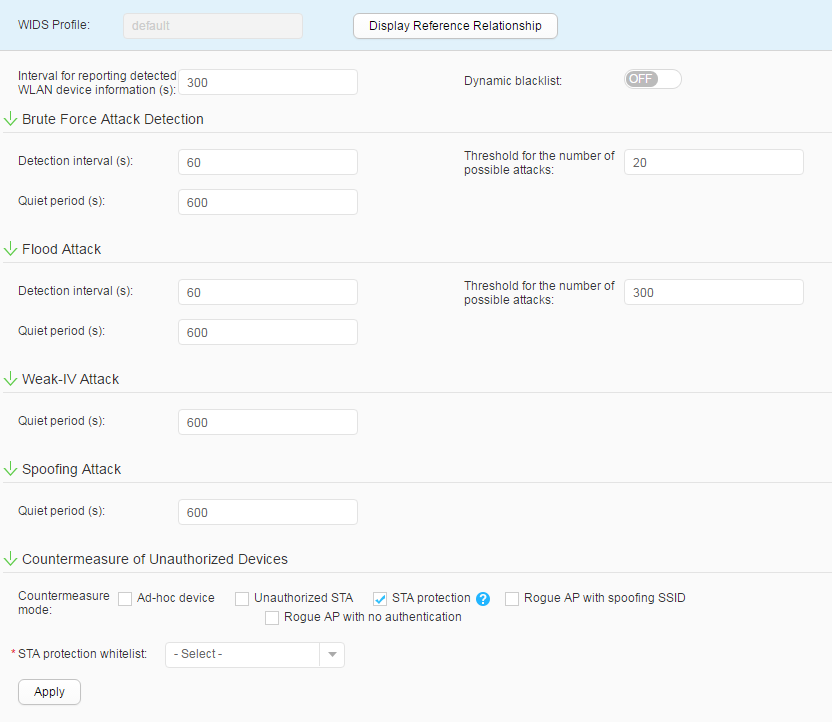
A WIDS profile can be used to configure parameters for the wireless device detection, rogue device containment, and attack detection functions.
Procedure
- Create a WIDS profile.
- Click OK. The parameter setting
page of the new WIDS profile is displayed.
- Click OK. The parameter setting
page of the new WIDS profile is displayed.
- Modify a WIDS profile.
- Choose . The WIDS Profile List page is displayed.
- Click the name of the WIDS profile that you want to modify. The WIDS profile configuration page is displayed.
- Set parameters for modifying a WIDS profile. Table 1 describes the parameters for modifying a WIDS profile.
- Click Apply. In the Info dialog box that is displayed, click OK.
- Delete a WIDS profile.
- Choose . The WIDS Profile List page is displayed.
- Select the profile that you want to delete and click Delete. In the Confirm dialog box that is displayed, click OK.
- Display the profile reference relationship.
- Select the profile of which you want to display the
reference relationship and click Display Reference Relationship. The system displays the types and names of the objects that reference
the profile.

Click Hide Reference Relationship. The system hides the displayed results.
- Select the profile of which you want to display the
reference relationship and click Display Reference Relationship. The system displays the types and names of the objects that reference
the profile.
- Configure and modify the profiles referenced by a WIDS
profile.
A WIDS profile can reference WIDS whitelist and WIDS spoof SSID profiles.
- Choose . The WIDS Profile List page is
displayed. Click
 next to WIDS Profile. The system displays
names of the WIDS profiles. Click next to a WIDS profile name. The profiles
referenced by the WIDS profile are displayed in the menu navigation
area.
next to WIDS Profile. The system displays
names of the WIDS profiles. Click next to a WIDS profile name. The profiles
referenced by the WIDS profile are displayed in the menu navigation
area. - Click any profile referenced by the WIDS profile. The configuration page of the referenced profile is displayed on the right. You can select another profile from the drop-down list and set the profile parameters. For descriptions of the profile parameters, see its configuration page.
- Click Apply. In the Info dialog box that is displayed, click OK.
- Choose . The WIDS Profile List page is
displayed. Click