Connecting Copper Cables
Context

- Both ends of an idle copper cable must be covered by an ESD cap.
- Do not bend copper cables over their minimum bend radius. Doing so may damage wires in the cables.
- Connectors of copper cables must be clean to ensure normal communication. If a connector is contaminated, clean it with cleaning fabric.
- Ensure that the bend radius of the copper cables or optical fibers is greater than the minimum bend rand required. For specific bend radiuses of various cables, see "Cables" in the Hardware Description of the product.
Procedure
- Determine the number and type of ports to be connected and plan the cabling routes.
- Obtain the desired quantity and lengths of copper cables.
- Wear an ESD wrist strap or ESD gloves. When wearing an ESD wrist strap, ensure that it is in close contact with your wrist and grounded properly.
- Attach temporary labels to both ends of each copper cable and number them corresponding to port numbers. For details, see Engineering Labels for User Cables.
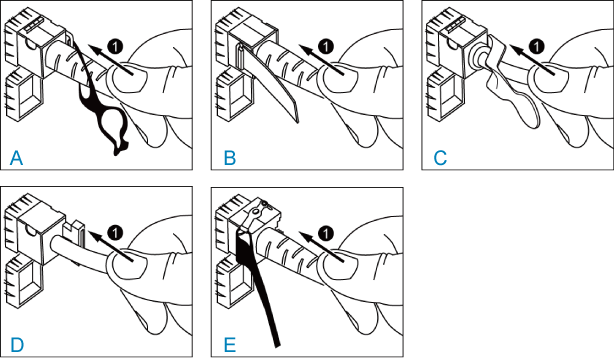
- Connect the copper cables to ports on the switch, matching
the numbers on the copper cables to those on the ports. To connect
them, align the copper cable connector with the port and insert the
connector. When you hear a click, the copper cable is securely connected.
See Figure 1.
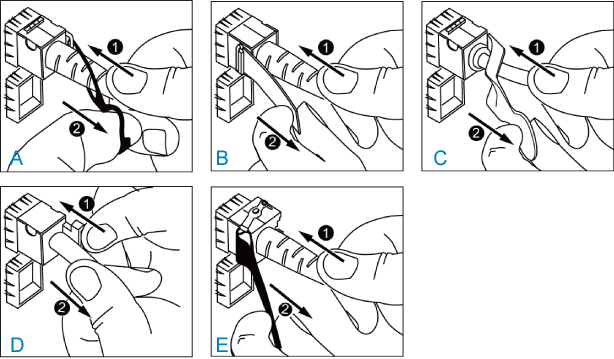
After connecting copper cables, verify that they are all correctly connected.To remove a copper cable, gently push the cable connector inward and then pull the handle of the connector. Do not forcibly pull the cable connector. See Figure 2.
- Arrange the copper cables to make them parallel, and bundle them with cable ties at a spacing of 150-300 mm (5.9-11.8 in.). Use a cable tie gun to cut off redundant cable ties.
- Replace all the temporary labels on the copper cables with permanent labels.