Portal Server
Context
To ensure the communication between the switch and Portal server, you must configure the Portal server IP address and parameters (including the port number and shared key of the Portal server) about information exchange between the switch and Portal server, and bind interfaces to the Portal server.

After configuring Portal authentication, perform the Authentication Configuration. The two functions implement user authentication together.
Procedure
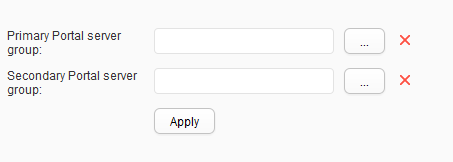
- Configure a Portal server.
- Click the Portal Server tab. The Portal Server tab page is displayed, as shown in Figure 1.
- Click
 and select a server name.
- Create a Portal authentication server.
- Click . The Portal Authentication Server List page is displayed.
- Click Create. The Portal Authentication Server List page is displayed, as shown in Figure 2.
Table 1 describes the parameters for creating a Portal authentication server
Table 1 Parameters for creating a Portal authentication server Parameter
Description
Server name
Indicates the name of a Portal authentication server.
Server IP
Indicates the IP address of the Portal server.
Source IP
Indicates the source IP address for the device to communicate with a Portal server.
Shared key
Indicates the shared key that the device uses to exchange information with the Portal server.
Confirm shared key
Enter the shared key again.
Packet port number
Indicates the port number that the device uses to listen on Portal protocol packets.
URL
Indicates the URL of the Portal server.
URL profile
The following parameters are valid when URL profile is selected.
URL
Indicates the redirection URL or pushed URL
User access URL
Indicates the original URL that a user accesses carried in the URL.
User MAC
Indicates the user MAC address carried in the URL.
User IP
Indicates the user IP address carried in the URL.
System name
Indicates the device system name carried in the URL.
MAC address format
- No separator
- normal: sets the MAC address format to XXXX-XXXX-XXXX. You can specify a character as the delimiter.
- compact: sets the MAC address format to XX-XX-XX-XX-XX-XX. You can specify a character as the delimiter.
Separator
Indicates the separator, which contains one character.
- Click
- Modifying a Portal authentication server.
- Click . The Configuration page is displayed.
- Choose from the navigation tree. The User Access Control page is displayed.
- Click the Portal Server tab. The Portal Server tab page is displayed.
- Click . The Portal Authentication Server List page is displayed.
- Click the name of the authentication server that you want to modify. The authentication server modification page is displayed.
- Modify parameters for the authentication server. Table 1 describes the parameters.
- Click OK.
- Delete a Portal authentication server.
- Click . The Portal Authentication Server List page is displayed.
- Select the authentication server name and click Delete. The system asks you whether to delete the record.
- To select a record, click the check box of the record.
- To delete records in batches, click the check boxes of records.
- Click