AS Addition
Procedure
- Create AS fabric-ports.
- Click Create and set AS fabric-port parameters, as shown in Figure 1.
- Click
 to complete the configuration.
- Create AS fabric-ports in a batch.
- Click Batch Import to enter the page for batch import of fabric-ports, as shown in Figure 2.
- Click
 to download the fabric-port file profile locally and fill in the profile.
 - Click
 to select the fabric-port file to be imported.
- Delete AS fabric-ports.
- Choose and click the Configure AS Fabric-Ports tab.
- Click Delete in the line where the AS fabric-port resides.
- In the dialog box that is displayed, click OK.
- Add ASs.
- Click Create and set AS parameters, as shown in Figure 3.
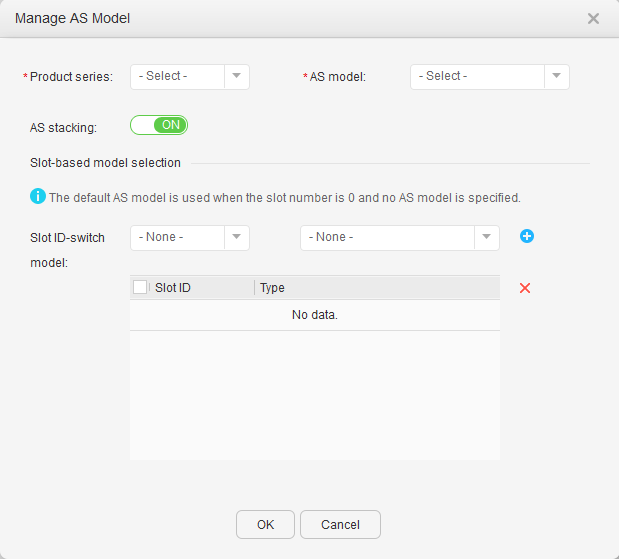
- Click Manage below AS Model. The Manage AS Model dialog box is displayed, as shown in Figure 4.
- Click ON for AS stacking to preconfigure the AS stack ID.
Select the slot ID and corresponding product model in the Slot ID-switch drop-down list box, and click
 .
. - Click to complete the configuration.
- Add ASs in a batch.
- Click Batch Import to enter the page for batch import of ASs, as shown in Figure 5.
- Click to download the AS file profile locally and fill in the profile.
- Click to select the AS file to be imported.
- Delete ASs.
- Choose and click the Manage ASs tab.
- Select the AS to be deleted and click Delete.
- In the dialog box that is displayed, click OK.
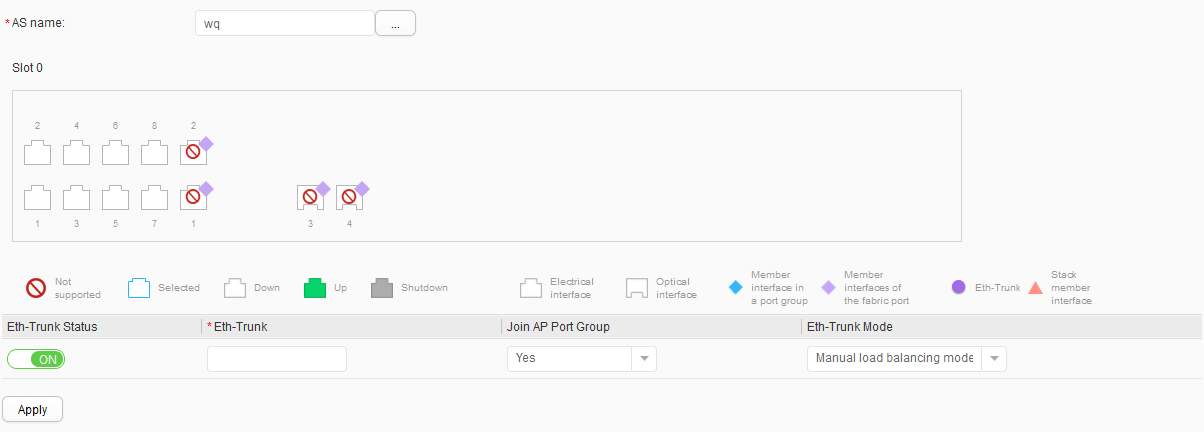
- Configure an Eth-Trunk for an AS.
- Click and select an AS.
- Click OK. The Eth-Trunk configuration page is displayed, as shown in Figure 6.
- Set the Eth-Trunk status.

ON: The Eth-Trunk is enabled.
OFF: The Eth-Trunk is disabled.
- Click