Example for Configuring 802.1X Authentication (Authentication Point on the Access Switch)
Networking Requirements
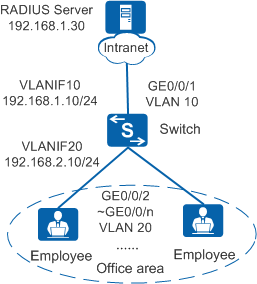
In Figure 1, terminals in a company's offices are connected to the company's intranet through the switch. GE0/0/2 to GE0/0/n on the switch are directly connected to terminals in offices. GE0/0/1 on the switch is connected to the RADIUS server through the intranet.
Configuration Roadmap
The configuration roadmap is as follows:
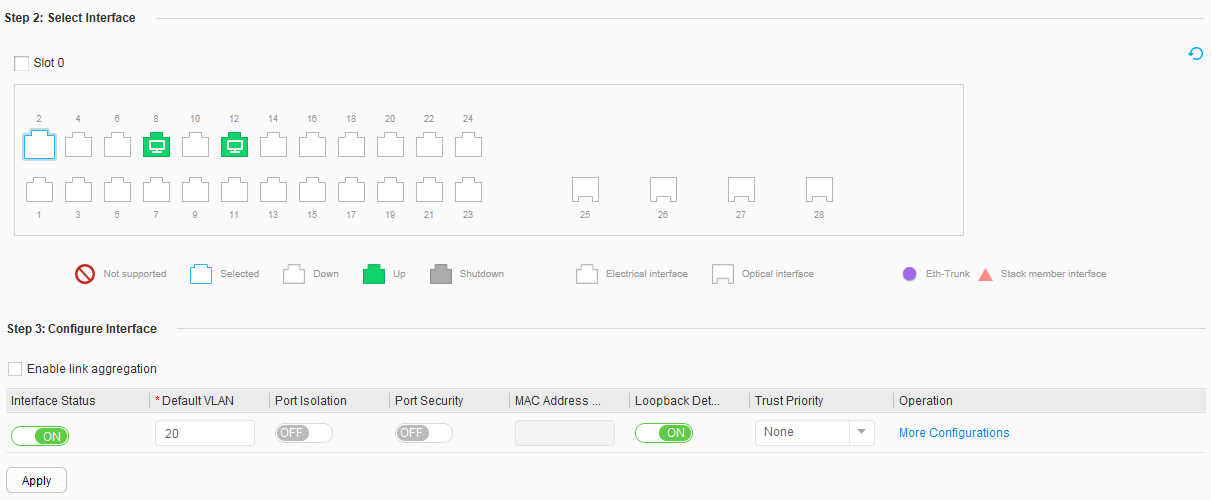
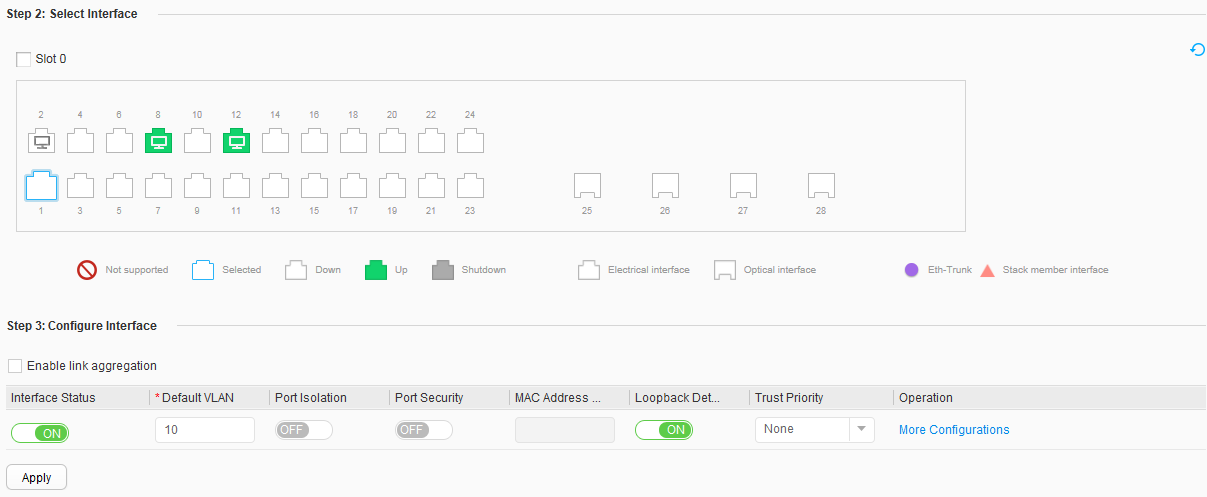
- Specify the VLANs to which interfaces belong.
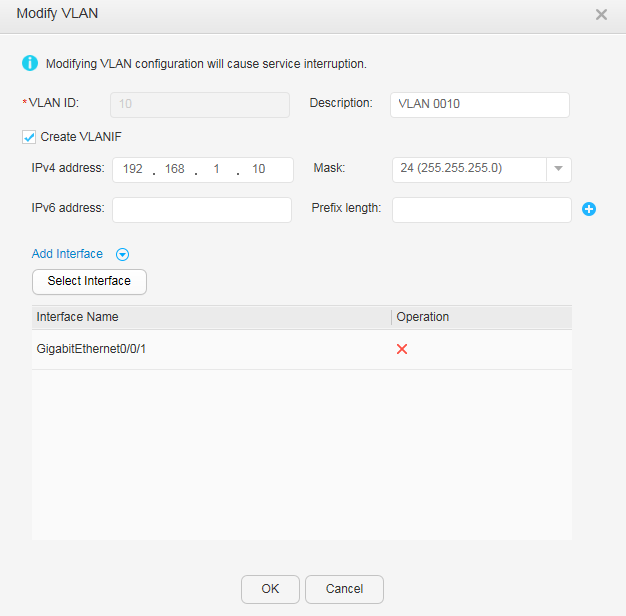
- Configure an IP address for each VLANIF interface.
- Configure AAA on the switch to implement identity authentication on access users through the RADIUS server. The configuration includes configuring a RADIUS server template, an AAA scheme, and an authentication domain, and binding the RADIUS server template and AAA scheme to the authentication domain.
- Configure 802.1X authentication to control network access rights of the employees in offices, including the 802.1X profile, authentication profile, and 802.1X authentication on interfaces.

Before performing the following operations, ensure that there are reachable routes between user terminals and the server.
Procedure
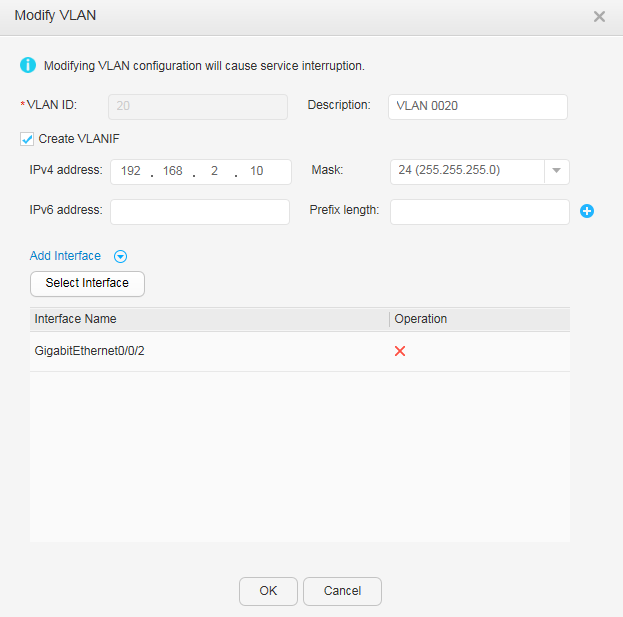
- Specify the VLANs to which interfaces belong.
- Configure an IP address for each VLANIF interface.
- Configure AAA.
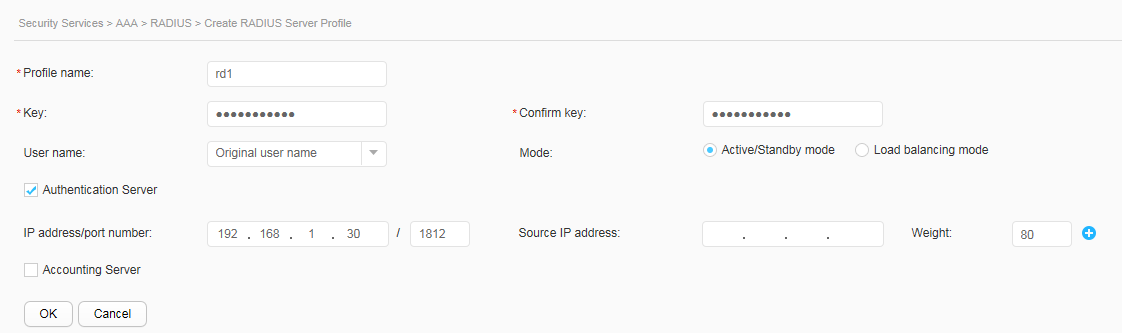
- Choose , click the RADIUS tab, and click Create to create and configure the RADIUS server template rd1. Set parameters according to Figure 6 and click OK.
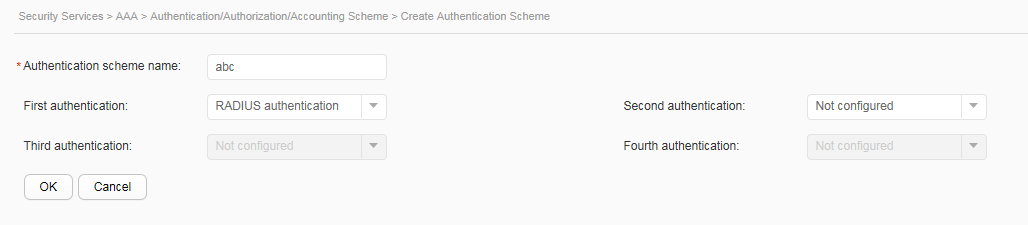
- Click the Authentication/Authorization/Accounting Scheme tab, and click Create to create the AAA authentication scheme abc and set the authentication mode to RADIUS. Set parameters according to Figure 7 and click OK.
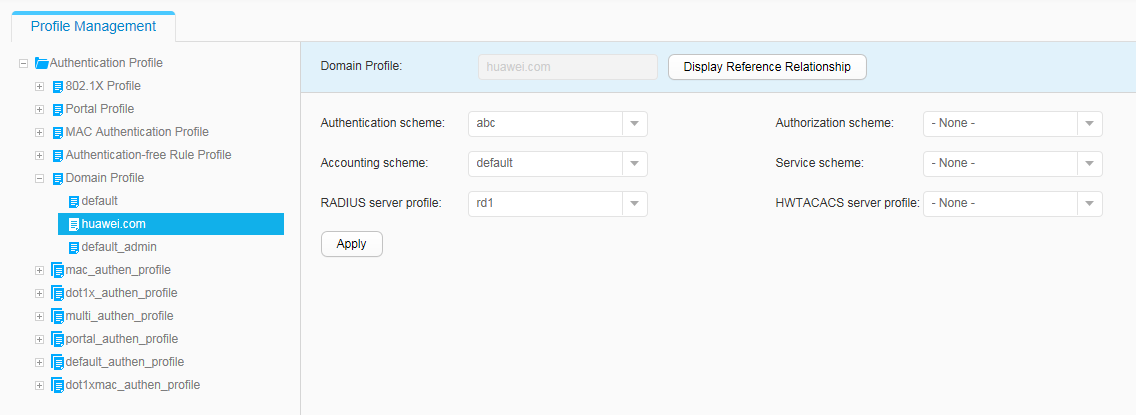
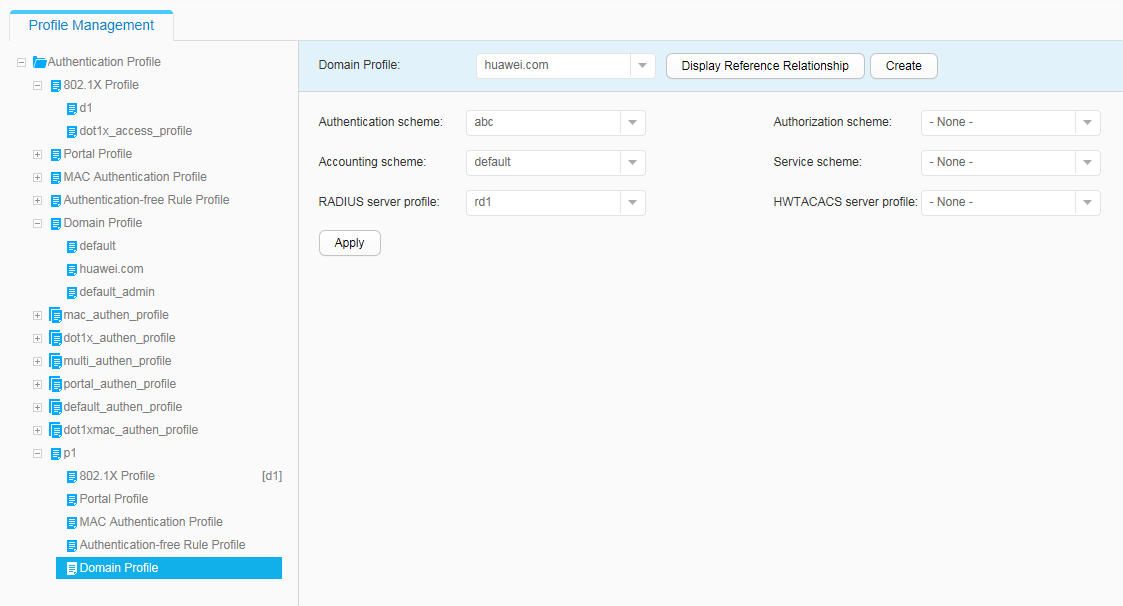
- Choose to open the Domain Profile List page. Click Create to access the Create Domain Profile page. Enter huawei.com for Profile name and click OK. The authentication domain huawei.com is created and the AAA authentication scheme abc and RADIUS server template rd1 are bound to the authentication domain. Set parameters according to Figure 8 and click Apply.
- Configure 802.1X authentication.
- Run the authentication unified-mode command in the system view to set the NAC mode to unified.
By default, the unified mode is used. The switch restarts after the NAC mode is changed between the common mode and unified mode.
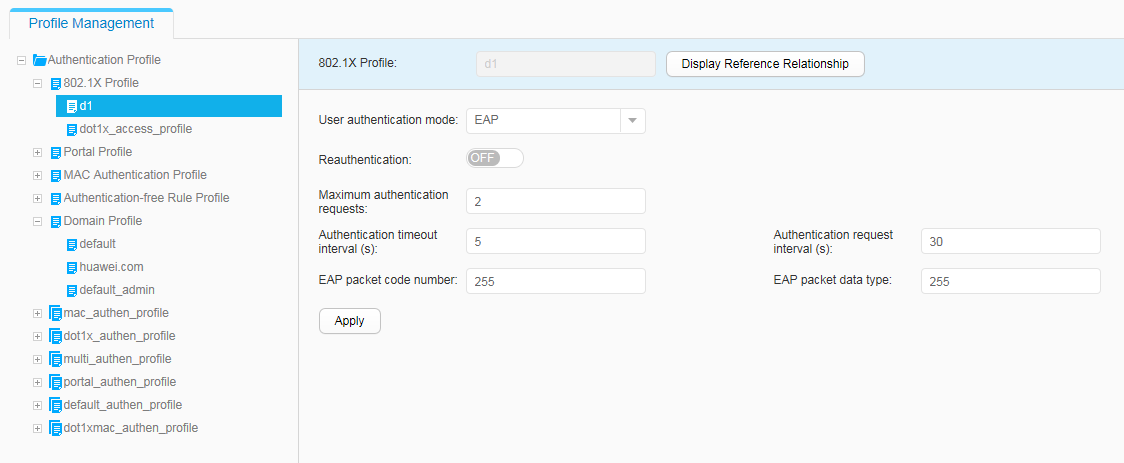
- Choose to access the 802.1X Profile List page. Click Create. The Create 802.1X Profile page is displayed. Enter d1 for Profile name and click OK to create an 802.1X profile. Set parameters according to Figure 9 and click Apply to complete the configuration of the 802.1X profile d1.
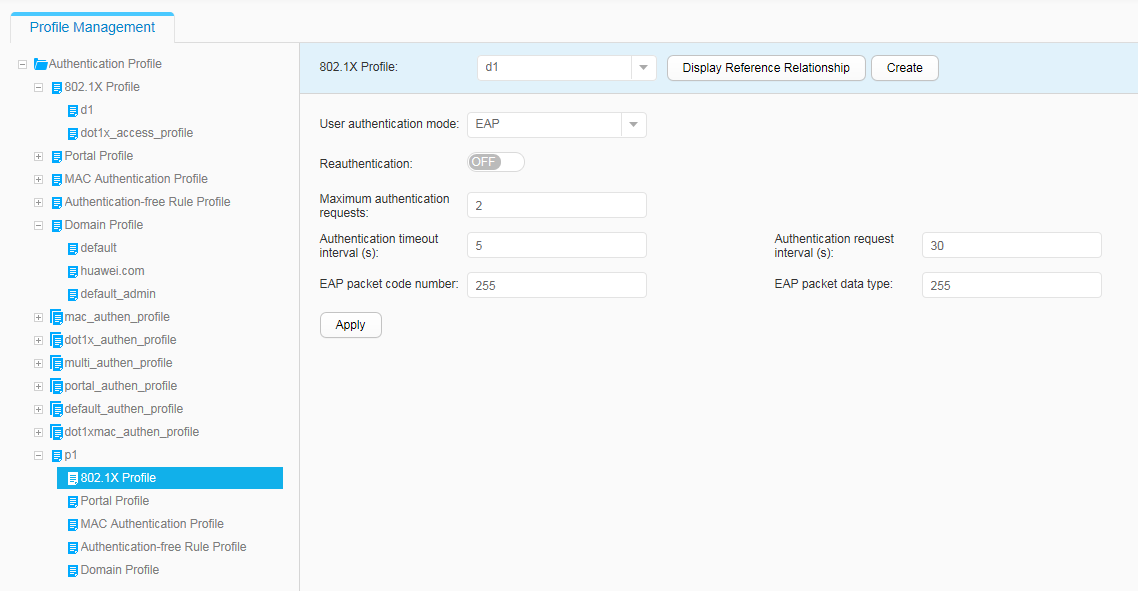
- Choose to access the Authentication Profile List page. Click Create and enter p1 for Profile name, as shown in Figure 10. Click OK to create the authentication profile p1.
- Choose . Select d1 from the 802.1X Profile drop-down list, as shown in Figure 11, and click Apply to bind the 802.1X profile d1 to the authentication profile p1.
- Choose . Select huawei.com from the Domain Profile drop-down list, as shown in Figure 12, and click Apply to apply the authentication domain huawei.com to the authentication profile p1.
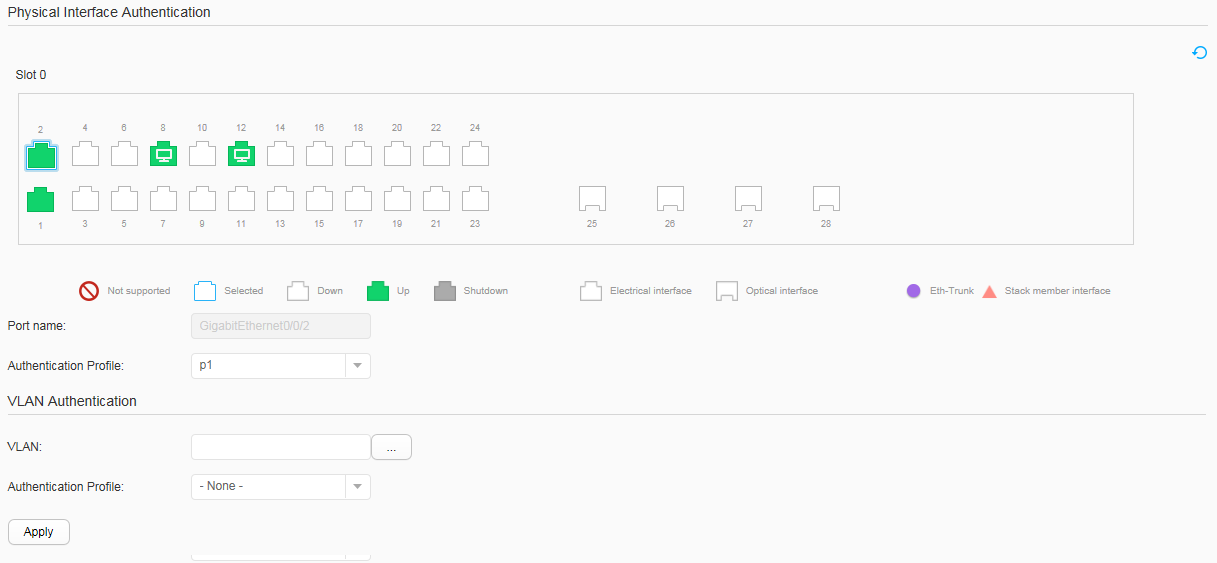
- Choose . Select GE0/0/2 on the front panel. Select p1 from Authentication Profile, as shown in Figure 13, and click Apply. Configure GE0/0/3 to GE0/0/n in the same way.
- Run the authentication unified-mode command in the system view to set the NAC mode to unified.

Operation Result
- Start the 802.1X client on a terminal, and enter the user name and password for authentication.
- If the user name and password are correct, a client page displays an authentication success information and you can access the Internet.
- After going online, log in to the web system. Choose . The 802.1X user information is displayed.